10 Tips for Installing Pavers: A Step-by-Step Guide
 Installing pavers can transform your outdoor space into a beautiful, functional area, whether you’re creating a driveway, patio, walkway, or pool deck. However, achieving a professional-looking result requires careful planning, preparation, and attention to detail. To help you get the best results, here are ten essential tips for installing pavers.
1. Plan Your Design Carefully
Before you begin your project, take the time to plan your design. Consider the shape, size, and pattern of your pavers, as well as the overall layout of the space. Make sure the design complements your home and landscape. Sketch out your plan and measure the area to determine how many pavers you’ll need. Proper planning ensures a smooth installation process and a finished product you’ll love.
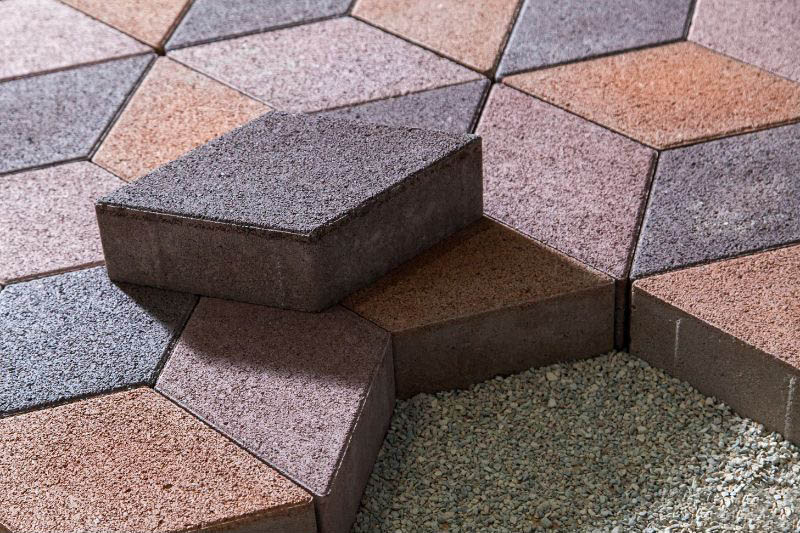
2. Choose the Right Pavers
Selecting the right type of pavers for your project is crucial. Pavers come in various materials, such as concrete, brick, travertine, and natural stone, each with its own benefits. Consider factors like durability, appearance, maintenance, and cost when making your decision. For example, concrete pavers are durable and versatile, while travertine is elegant and ideal for pool decks. Make sure your choice suits both your aesthetic preferences and functional needs.
3. Prepare the Site Properly
Proper site preparation is the foundation of a successful paver installation. Start by marking the area where you plan to install the pavers. Then, excavate the site to the appropriate depth, considering the thickness of the pavers and the base material. Generally, you’ll need to dig 6-8 inches deep for walkways and patios and 10-12 inches for driveways. Ensure the ground is level and compacted to prevent future settling or shifting.
4. Use a Strong Base
The base layer is critical to the longevity of your paver installation. Use a high-quality crushed stone or gravel base material, which provides stability and drainage. Spread the base material evenly across the excavated area, then compact it using a plate compactor. The base should be at least 4-6 inches thick for patios and walkways and 8-12 inches for driveways. A well-compacted base prevents pavers from shifting and settling over time.
5. Ensure Proper Drainage
Good drainage is essential to prevent water from pooling on your paver surface, which can cause erosion, shifting, and damage over time. To ensure proper drainage, create a slight slope (usually about 1/4 inch per foot) away from your home or any structures. This allows water to flow off the pavers and into the surrounding landscape. Additionally, consider installing drainage channels or pipes if necessary.
6. Use Edge Restraints
Edge restraints are crucial for keeping your pavers in place and maintaining the integrity of your design. Install sturdy edge restraints, such as plastic, aluminum, or concrete, along the perimeter of your paver area. These restraints prevent the pavers from spreading or shifting over time, especially in high-traffic areas or driveways. Secure the edge restraints with spikes or stakes, ensuring they are flush with the paver surface.
7. Lay the Pavers with Precision
When laying the pavers, start from one corner and work your way across the area, following your design plan. Place each paver carefully, ensuring they are aligned and spaced evenly. Use spacers if necessary to maintain consistent gaps between the pavers. As you lay the pavers, check for levelness and make adjustments as needed. Avoid walking on the pavers during installation to prevent shifting.
8. Fill Joints with Sand
Once all the pavers are in place, fill the joints between them with joint sand. This step locks the pavers together and adds stability to the surface. Use a broom to spread the sand over the pavers, sweeping it into the joints until they are completely filled. Then, use a plate compactor to vibrate the pavers and help the sand settle into the joints. Repeat this process until the joints are fully packed with sand.
9. Seal the Pavers
Sealing your pavers is an important step to protect them from stains, weathering, and wear. A high-quality paver sealer enhances the color and appearance of the pavers while providing a protective barrier against moisture, oil, and dirt. Apply the sealer evenly using a roller or sprayer, following the manufacturer’s instructions. Allow the sealer to dry completely before using the paver surface.
10. Perform Regular Maintenance
To keep your pavers looking new and in good condition, perform regular maintenance. Sweep the surface regularly to remove debris, clean stains promptly, and reapply sealer every 2-3 years. Additionally, inspect the joints and reapply joint sand as needed to prevent shifting. Proper maintenance ensures the longevity of your paver installation and keeps your outdoor space looking its best.
Conclusion
Installing pavers can be a rewarding DIY project that enhances the beauty and functionality of your outdoor space. By following these ten tips, you’ll ensure a successful installation that lasts for years to come. Whether you’re creating a new patio, driveway, or walkway, careful planning, preparation, and attention to detail are key to achieving professional results.
For homeowners including Sarasota, Tampa, Saint Petersburg, Venice, Fort Myers, Naples, Lakewood Ranch, Anna Maria Island, Apollo Beach, Bradenton, Englewood, Longboat Key, Osprey, Palmetto, Parrish, Siesta Key, and more, GES Pavers offers expert paver installation services. Our team of professionals will help you design and install the perfect paver project for your home. Contact us today to get started on your outdoor transformation!
Contact GES Pavers today at 941-867-6793 to learn more about our professional pavers installation services and how we can help you keep your outdoor spaces looking stunning and safe for years to come.